Here are some pictures:
 |
| The berceau |
 |
| My diorama shows the battlefield at 1800 - by this stage the Chateau had burnt. |
 |
| It's been said my model doesn't show enough of the wood where much of the fight took place - well here it is. |
 |
| I've created this diagram of the formal garden |
 |
| And then marked it out on the diorama |
 |
| The view through the north gate |
 |
| You can see how large an area must be filled by the formal garden. |
 |
| View of the balustrade, with diagram |
 |
| The killing zone |
 |
| View down the west side |
 |
| The track looking north |
 |
| The killing zone from the west - the troops stop at the edge of the section. |
 |
| The whole building complex |
 |
| The chapel |
 |
| The track leading to La Belle Alliance |
 |
| Looking east |
 |
| The burnt west barn |
 |
| I've made some of my trees from dead bonsai trees from a local bonsai club |
 |
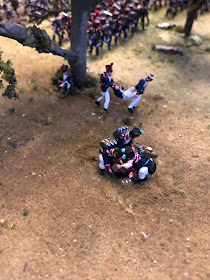
| Wounded conversions |
 |
| The formal garden from the west looking east. |
 |
| The star at the east end of the formal garden. This was planted with ornamental trees and hedged . |
 |
| View down the killing zone. |


 |
| If you look carefully, there is a Classical statue at the centre of the star. based on this HYTTY figure. |
 |
| Frank Ziegler figures from Hagen - with bicornes removed |
 |
| These voltigeurs are all conversions |
 |
| Casualties |
 |
| The Grenadiers are mostly Qualicast |
 |
| Early stages of the north-south track through the wood. This was scene of the most intense fighting. |
 |
| More of the Qualicast |
 |
| Another view of the kitchen garden. The Coldstream Sergeant Major threatened the Cat for anyone who walked on the vegetables |
 |
| This Fox Talbot photograph shops an extraordinary level of craftsmanship but given it's English probably wouldn't be appropriate. |
 |
| This Monet painting obviously shows a French haystack |
 |
| And here's an experimental haystack, not yet attached or set alight |
 |
| And since it caught fire, it'll need some careful modelling |